Requesting Help for Captioning
Request multimedia captioning or transcript assistance via the DE: Accessibility Support Request form on the Distance Education Help Forms page.
Accessibility Best Practices in Zoom
RESOURCES FOR ACCESSIBILITY CONSIDERATIONS IN ZOOM
Zoom blog: Tips for Hosting More Accessible Meetings
Yale University: Accessibility Best Practices for Zoom Meetings
Two Captioning Settings
There are two settings to turn on in your account settings that aid in captioning efforts. One will generate live auto-generated captions during a Zoom session, and the other will generate auto-captions to your Zoom recordings. It is recommended to have both features turned on. See below for more details.
Note: Auto-generated captions are not usually accurate enough for a deaf or hard-of-hearing student, but still are a good half-measure until human-created captions can be created. If you have an identified deaf or hard-of-hearing student in your course, get captioning assistance by submitting the DE: Accessibility Support Request form on the Distance Education Help Forms page.
Live Captioning in Zoom
ORDER LIVE CAPTIONING FOR ZOOM LECTURES
Professional-quality live captioning is reserved for live online classes with student participation. You will need to provide a schedule of lecture dates and times.
To request live captioning, contact the Disability Resources Department if you have a disabled student in your course.
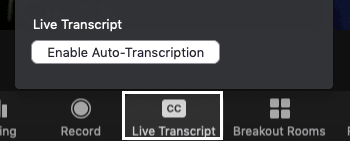
How to Turn on Live Auto-Captions
Turn on a feature to generate live auto-generated captions during a Zoom session. Update to the latest version of Zoom. Turn on the feature in your Zoom settings, in the Meeting tab, under Closed Captioning, and then activate it from the bottom menu while in a Zoom session.
Auto-Captions for Zoom Recordings
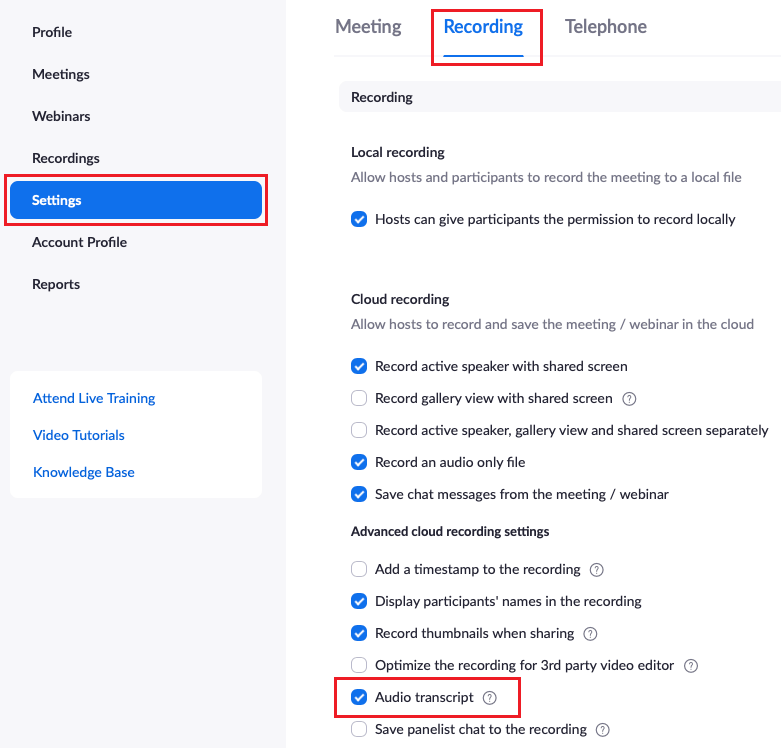
Turning on the Audio Transcription feature will add auto-generated captions to your recorded videos. These auto-captions can act as a temporary accessibility solution while videos are being captioned otherwise. It is always a good idea to turn it on. This feature is only available when you are recording your lectures to the cloud.
-
Sign into ConferZoom web portal (see Sign In link in upper right), and click Settings from the side navigation. Then click on the Recording tab.
-
From the Recording tab, navigate to the Cloud recording option.
-
Click the Audio Transcript checkbox to enable it, then click Save to confirm the change.
Order Captions for Recorded Zoom Videos & Embed Lectures in Your Canvas Course
See the following tutorials on how to download a Zoom video, upload it to 3C Media Solutions, order captions, and embed the video in your Canvas Course:
- Captioning a Video Lecture - Instructions on YouTube
- Download Zoom Recordings and Upload to 3C Media - TechConnect Cloud Tutorial
A few notes about this process:
- You don't have to wait until your captions are ready to embed the video. After embedding the video, when the captions are ready, they will just show up in the embedded video.
- The video makes a good point that by embedding the lecture video in your course, rather than simply linking to it, students won't be able to share the video with others not enrolled in your course.
- 3C Media Solutions is a good place to store your videos. Archived videos in Zoom is not a permanent storing option, at some point they will automatically be deleted.
