For an instructional video on this topic, see our blog post: GET READY FOR SPRING 2018—BACK UP PAST COURSES & SET UP NEW COURSES.
STEP 1: Select the "Destination" Course
From your dashboard, choose the course shell you would like the content to end up in.
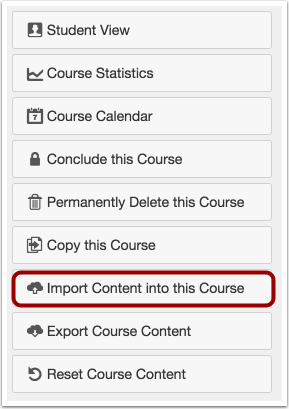
Choose Settings from the course navigation.
From the right sidebar, click Import Content into this Course to import content.
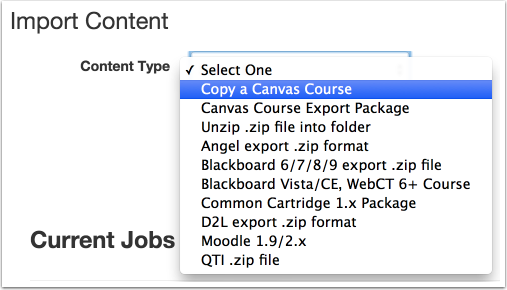
STEP 2: Set Parameters for the Import
In the drop-down menu under Import Content, select the Copy a Canvas Course option.
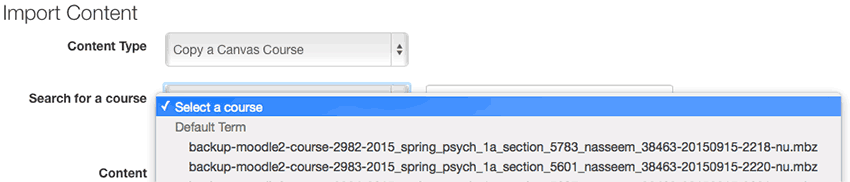
STEP 3: Choose the Course to Copy From
Select the course from the Drop-Down List. You can also do a search by Course Name.
STEP 4: Indicate the Migration Content
If you want to import all of the content from the course, click the All content radio button [1].
If you want to select specific content, such as only certain modules, assignments or quizzes, click the Select specific content radio button [2].
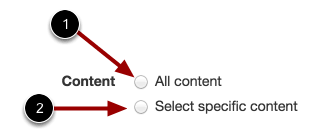
IMPORTANT - The import process doesn't overwrite existing content; it simply adds in the additional content. ONLY select the All Content radio button if you want everything from the original course shell added to the destination shell. Otherwise, you may end up with duplicate items.
OPTIONAL STEP: Adjust Events and Due Dates
See more information about adjusting events and dates on the How do I import content from another Canvas course Canvas Guide.
STEP 5: Perform the Import
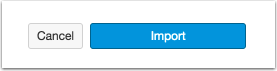
Click the Import button.
(This may be a little counter-intuitive since you haven't yet selected the specific content to be imported. That's the next step.)
STEP 6: Select the Content
- In the Current Jobs area, click the blue Select Content button once it appears. (Depending on how big the imported course shell is, this may take a little while.)

- From the pop-up window, mark the checkbox next to all content categories you want imported. This will automatically select all items within the marked categories.
NOTE: This screenshot is for example purposes only. Your content options may differ.

- To select only certain items within a category, click the arrow next to the category to open up the list of available items. Select all items you want imported. If you want most of the items it may be easier to use the select all option (above) and then de-select the few items you don't want imported.
NOTE: This screenshot is for example purposes only. Your content will differ.
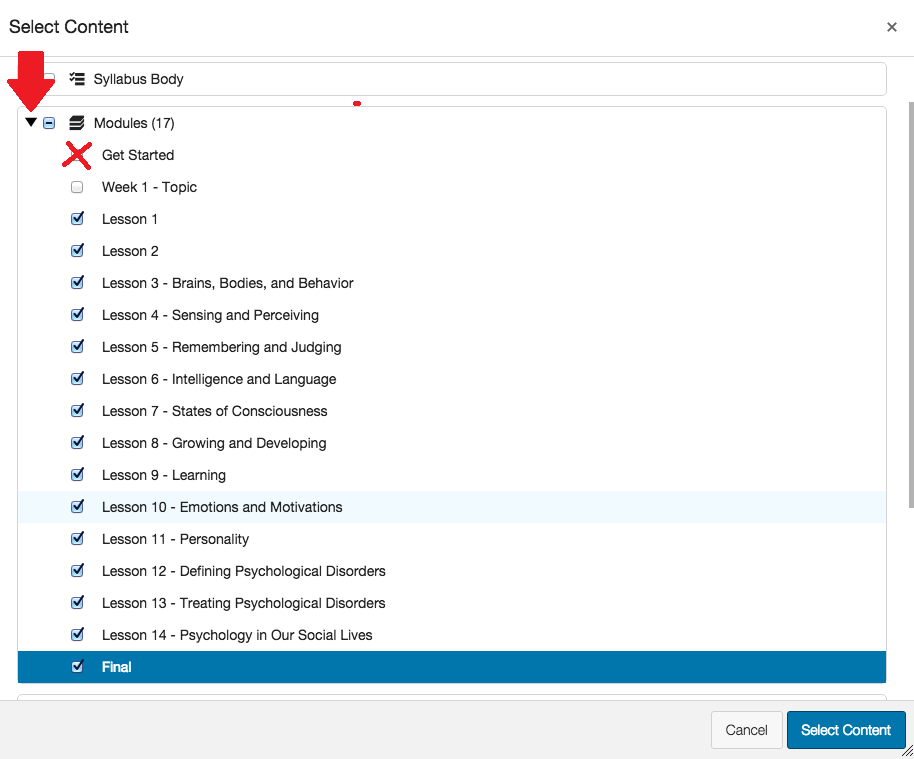
- Click the blue Select Content button.
- When the green “Completed” button appears in the Current Jobs area, your content has been imported.
NOTE: Don’t worry if the “Completed” button is orange and shows issues; as long as it says “Completed,” it’s OK.

That's it!
(If you'd like a more detailed set of directions, Canvas has a nifty guide.)
If you want to empty the original course shell (so you once again have a blank slate to play with):
- Click Settings in the course navigation of the course you want to empty.
- Click the Reset Course Content button in the right hand sidebar.
- Click the red Reset Course Content button.
NOTE: This will action PERMANENTLY delete all associated assignments, discussions, quizzes, modules, rubrics, pages, files, learning outcomes, question banks, collaborations, conferences, or any other content from this course shell. This action is irreversible, and the data cannot be recovered.
