HTML pages are the best way to deliver content online because they are the easiest format for making content accessible to everyone including the sight impaired. PDFs offer an easy way to make your documents deliverable and readable over the internet, but making them accessible to the sight impaired offers a few more challenges than HTML pages.
In the past, PDFs were a better choice than Word documents because they will not require the viewer to purchase a program to read the file. The free applications Libre Office and Open Office are now readily available for opening Microsoft Office documents, making Word documents a viable choice for accessible document delivery.
When using PDFs for required content in an online class, you will need to make sure that they are accessible to disabled students. Follow this tutorial to create more accessible PDFs. To follow these notes, you will need a recent version of Microsoft Word and Adobe Acrobat, the Pro version. Both of these programs are available to faculty and staff through IT.
Flex Credit
If you are taking this workshop for Flex Credit, take the post-assessment test:
- Click on this link to self-enroll in the Canvas course that has the quiz.
- You will be taken to the Canvas login page. Login with your usual Canvas login (same as your Outlook login).
- Click on the "Enroll in Course" button.
- Then click on the "Go to the Course" button. If "Go to the Course" does not show, click on the "Go to Your Dashboard" button.
- Find the course in your Dashboard.
- Click on the quiz from the Home page.
- Take the quiz and submit.
- Apply for Flex Credit from your Faculty Portal.
Mac Issues
- The workflow described in this tutorial runs into problems when working on Mac computers
- You can add alternative text to images starting with version 14.1 or later of Office 2011 for Mac or any version of Office 2016 for Mac.
Right-click the image and choose Format Picture, then choose Alt Text from the side menu. - PROBLEM: When creating PDFs from Word for Mac, you may easily end up with untagged PDFs
- Alternative text put into images will not transfer to the PDF when creating an untagged PDF
- SOLUTION - 4 Options:
- Have a later version of Microsoft Office on your computer. In the Save As dialog, from the File Format drop down choose PDF. Below this, select the radio button "Best for electronic distribution and accessibility."
The other options are only needed when using an older version of Microsoft Word. - Download LibreOffice (free application) and generate the PDF from it
- Author a document in MS Word on Mac, using headings and providing text in both the title and description fields, following the correct Word formatting as described below
- Use LibreOffice for Mac to export a tagged PDF
- Generate PDF on a PC
- format document correctly in Word as described below
- bring Word files created on Mac to PC version of Office to generate the PDF (can be done at the Center for New Media)
- Generate PDF on Mac and fix in Acrobat
- add alternative text to images in Acrobat Pro (adding alternative text in Word will be a waste of time in this scenario)
- check reading order and repair as necessary
- this solution is not as good because any time you want to update the file, you will need to create a new PDF and go through the process of fixing it again
- Have a later version of Microsoft Office on your computer. In the Save As dialog, from the File Format drop down choose PDF. Below this, select the radio button "Best for electronic distribution and accessibility."
Online Content Delivery
Word docs are not the best way to deliver content online because accessing them requires students to have the Word program, or a free alternative (Open Office or Libre Office), and reading them will require the student to leave the course management environment, disrupting the flow. That being said, disabled students find Word docs easy to work with using assistive technology, and some may even prefer Word docs to PDFs.
Choices for Online Delivery
- HTML documents
- Usually fast to load
- No need for programs other than a free browser
- PDFs
- Acrobat Reader is free and a large percentage of viewers already have it downloaded
- Need to link to Adobe Reader (http://get.adobe.com/reader/) in your course materials to pass accessibility compliance
- More challenging to make accessible than HTML documents
- Need to format correctly in Word first to more easily make an accessible PDF file
- Word documents
- Requires the student have Word or Open Office
- Need to link to Open Office (https://www.openoffice.org/download/index.html) in your course materials to pass accessibility compliance
- Need to format correctly to work with assistive technology
What Makes a Document Accessible?
- Can be accessed without purchase of extra programs or readers
- Can be read from a screen reader and other assistive technologies for the disabled
- Can be searched for headings, form fields, etc.
- Structure of document remains intact so that screen readers read the document in correct order
- Non-text elements, such as images have text descriptions
Suggested Workflow for PDF creation
- Correctly format document in Word
- Create PDF
- Check the PDF in Acrobat Pro
- Make necessary corrections in Acrobat Pro
Formatting Text in Word
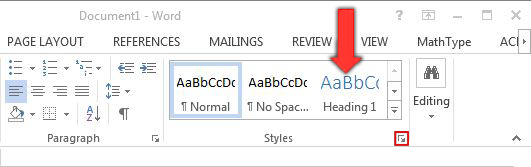
- Use Word’s built-in styles
- Heading 1, Heading 2, etc. In Word, have the Home tab selected, choose a style right from the ribbon or click on the Change Styles dialog box launcher to open the Styles palette
- Heading 1, Heading 2, etc. In Word, have the Home tab selected, choose a style right from the ribbon or click on the Change Styles dialog box launcher to open the Styles palette
- Avoid using Text Boxes
- Don't use tabs or spaces – use the Column tool (found by selecting the Layout tab) for multi-column layout
- Avoid complex layouts, sidebars, etc. for less problems with reading order
- Use standard fonts of at least 12 points
- Create Lists using the Bulleted or Numbered Lists commands, don't make "fake" lists by typing in bullets or numbers
Formatting Images in Word
- Add alternative text to images, charts, graphs, etc. Alternative text are descriptions of images, etc. that are read back on screen readers for the visually impaired.
- To add alternative text:
- Right-click the image
- Choose Format Picture
- Select the third icon (square with arrows)
- Enter alternative text in the “Description” box.
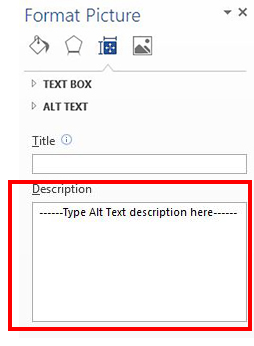
- Make alternative text descriptive, yet concise. See the following article on writing good alternative text:
Formatting Data Tables in Word
- Use true tables – do not use tabs, spaces or columns for sets of data
- Create simple tables
- Don’t nest tables
- If you have a header row and your table may span more than one page, you need to do the following:
- Repeat header row over pages:
- Select header row
- Right click, on the table, choose “Table Properties”
- Select “Repeat as header row at the top of each page”
- Repeat header row over pages:
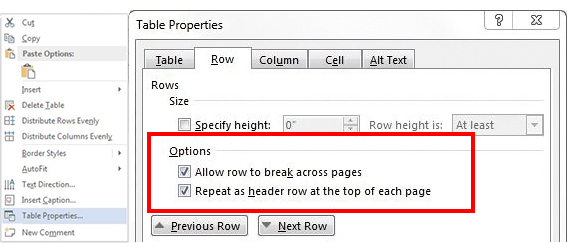
If you have a header row, turn on header row in Table Options of Tables Layout tab
This setting will make sure your table has structural tags behind the scenes to designate your first row as header cells. Only do this if you in fact have header cells - meaning that your table has cells in the first row that describe the data in the cells below.
Hyperlinks in Word
- Use meaningful text that makes sense out of context – do not use “click here”
- Control + K keys to insert hyperlink
- Click on “Screen Tip” button in Insert Hyperlink dialog box to add description of link as needed
- Hyperlink will stick with document to PDF version
- See this article on Links and Hypertext that describes how to write good link text
Use of Color
- Documents using color should be understandable for people who can’t perceive color
- Use high contrast between background colors and text colors
Creating PDFs from Word
- With Adobe Acrobat Pro installed, you can create PDFs from MS Office applications
- This is the best method, more accessible, you will end up with a tagged PDF
- If you do not have Acrobat Pro:
- download “Microsoft Save as PDF” Add-in from Microsoft site
Save your file as a PDF
- Select the Acrobat tab in the Ribbon
- Click on the Create PDF button in the Ribbon
- Choose where to save the PDF and click Save
Reviewing for Accessibility Workflow
Once you have a PDF document, you will need to review it for accessibility.
Adobe Acrobat XI Adobe Help Document
In Adobe Acrobat Pro version XI, there is now an Accessibility Wizard to help guide you through the process of making a PDF accessible. The process of working inside Adobe Acrobat Pro is now made much easier with the new accessibility features and the wizard. See this Adobe Help Document: Create and verify PDF accessibility (Acrobat Pro) for step-by-step instructions on working with the new Adobe Acrobat XI accessibility features.
Using the Accessibility Wizard
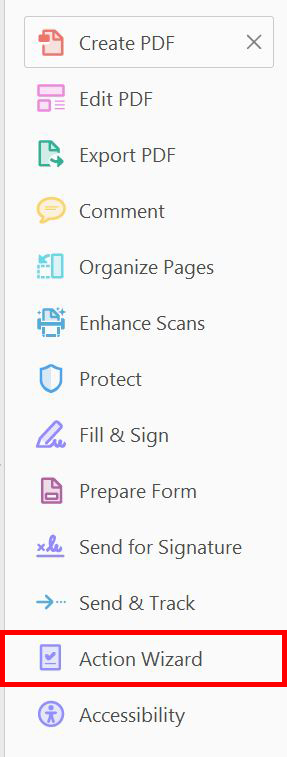
Newer versions of Adobe Acrobat Pro include the accessibility wizard. This tool is a fast, easy, and reliable way to make PDF documents accessible. Because of its ease of use, it's recommended to use this tool rather than going through all of the steps manually. To use the accessibility wizard, open any PDF in Acrobat Pro, and following these steps:
1. From the Tools panel on the right side of the Acrobat interface, select Action Wizard then select Make Accessible. If you don't see Action Wizard in the Tools panel, open it by going to the menu bar and selecting View > Tools > Action Wizard.

2. Select "Start"

3. On the window that appears, type in a short, concise title for the document. This should not be too long.

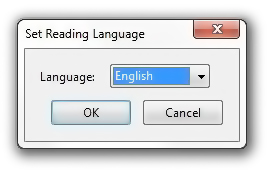
4. On the next window, leave the settings at their default values, then select OK. This will set the language to English in the event that you have a scanned document that needs to go through the Optical Character Recognition process to become text. Choose a different language if appropriate.

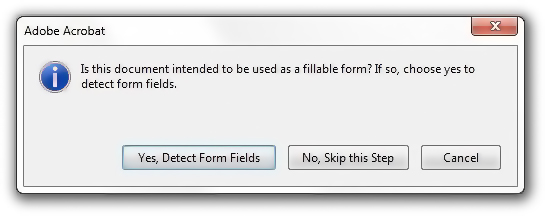
5. Next, choose whether or not this document is meant to be a fillable form. Most of the time, you will want to select "No, Skip this Step"
6. Next, choose the language of the document, this select OK
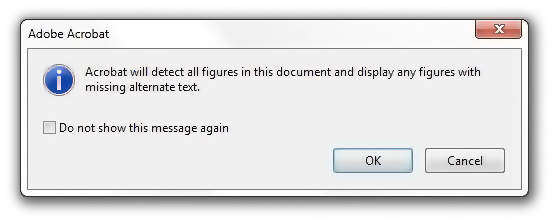
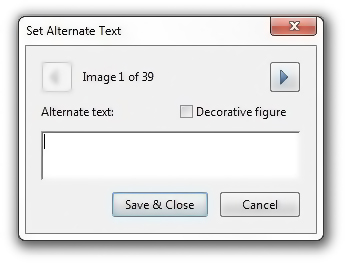
7. On the next window, click OK. Acrobat Pro will then show you all the figures in the document that are missing alternative text. From here, you can type in the alternative text for each figure, or tell Acrobat Pro that a specified figure(s) are decorative figures and thus do need need alternative text. When you are done, select "Save & Close". Sometimes it's difficult to see what image is being referenced. You may choose to Save & Close, then manually set your alternative text after you finish the Action Wizard.
8. On the next window, leave all the default values and select "Start Checking"

9. After you finish these steps, Acrobat Pro will show you all of the issues it found on the accessibility checker side bar. From there, you can click on the box next to the categories to see what kind of other problems need to be addressed. Most problems can be solved by right-clicking on them then selecting the appropriate action.

After the Wizard, Review for Accessibility
Once you have taken your PDF document through the Accessibility Wizard, you will need to review it for accessibility. The changes you make in Acrobat Pro using the accessibility tools will not affect the visual representation of the PDF. These changes will be reflected in how the document is read by assistive technology for the disabled.
- What the PDF will be analyzed for in the Accessibility Wizard
- Does the document have digital text?
- If not, Acrobat will use Optical Text Recognition (OCR) to convert the scanned text to real text
- Check if PDF is Tagged
- If not tagged, Acrobat will add tags, which are like semantic code behind the scenes to make your document more accessible
- Add alternative text to the images - you will be prompted to add these in the Wizard
- Does the document have digital text?
- Once Tagged, manually need to do these steps
- Check reading order and modify as necessary
- It may be easier to add alternative text manually after you exit the Wizard
- If the document is over 20 pages, you will need to add Bookmarks
Tagged PDFs
The PDF will need to be tagged. The Accessibility Wizard will do this for you.
- Tags provide structure to a PDF
- Tag structure can be used to control the document reading order
- Tags allow keyword searching, and search by headings or links
- Tags can also improve PDF form accessibility and conversion to alternate formats
- Untagged PDFs may be usable with assistive technology, but:
- can have issues with reading order
- cannot change reading order unless the document is tagged
Manually Add Tags in Acrobat Pro
In most cases, you will want to use the Accessibility Wizard to tag your document. In case you would like to do it manually, the following steps will guide you how to check for tags and add them manually in Acrobat.
Check to see if your document is Tagged
- Go to the File menu and choose Properties
- In the Document Properties dialog box, make sure that the Description tab is chosen, look down at the bottom of the dialog box, next to Tagged PDF – it will say Yes if it is tagged and No if it is not

Manually Adding Tags to a PDF Document in Acrobat Pro
If your document is not Tagged, you can add Tags in Acrobat Pro
-
Select Tools > Accessibility > Autotag Document

Evaluate The Reading Order
After finishing with the Accessibility Wizard, or manually adding tags to the document, you need to evaluate the reading order. It is important to evaluate reading order especially if the document contains text boxes, sidebars or is a multi-column layout. There are two ways to evaluate the reading order.
- Save the PDF as text (accessible) or text (plain) in Acrobat Pro
- Review the text file for errors or inconsistencies in the document reading order
- In Acrobat Pro, use the TouchUp Reading Order Tool
- Review numbered order of zones
The TouchUp Reading Order Tool in Acrobat Pro
Open up the TouchUp Reading Order Tool to see the order of the tagged elements of your document. To open, select Tools > Accessibility > Reading Order. The tool will open as a large palette and your document will show the various tags. If your document is not tagged, you will see nothing but the TouchUp tool. The TouchUp Reading Order tool may also be used to reclassify headings, tables or images in the document.
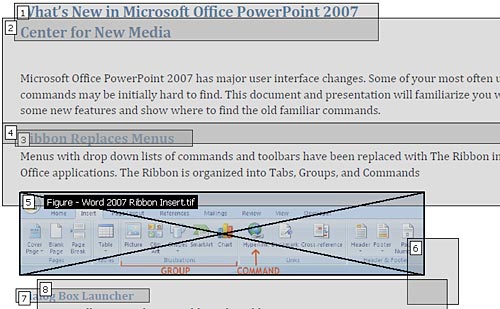
PDF Reading Order
After opening the TouchUp Reading Order tool, the document reading order shows as numbered boxes drawn around the content.
Changing the Reading Order in Acrobat
- Adding Content
- Ensure the document is a tagged PDF and open the TouchUp Reading Order tool
- With the cursor, draw a zone around the text you wish to add and select the appropriate label (text, heading, etc.)
Changing the Reading Order in Acrobat
- Removing Content
- Ensure the document is a tagged PDF and open the TouchUp Reading Order tool
- With the TouchUp Reading Order tool open, select the appropriate zone you wish to remove
- Select the “Background” button in the TouchUp Reading Order Panel
- This removes the specified zone (and content) from the document tag structure
Changing the Reading Order in Acrobat
- Re-ordering Content
- Ensure the document is a tagged PDF and open the TouchUp Reading Order tool
- From the bottom of the TouchUp Reading Order tool, click on the Show Order Panel button
- A new palette opens up with two tabs – Order and Tags
- Click on the Order tab
- Choose a numbered item and drag it to the spot you want it to be in the order
- The numbered items will change to reflect the new order
PDF Image ALT Text
Add alternative text to images, charts, graphs, etc. Alternative text are descriptions of images, etc. that are read back on screen readers for the visually impaired. To add alternate text to an image in Acrobat:
- Enable TouchUp Reading Order tool
- Right-click on image and select “Edit Alternate Text”
- Add alternate text, click “OK”
Read this article on writing good alternative text
Tables in PDFs
Although Word will automatically designate the header rows and columns in a table, those using screen readers can benefit from adding more information to the tables.
Designating the scope of header cells as either rows or columns
Completing this next task will alert the screen reader whether the header cells belong to a row or column
- Open the TouchUp Reading Order tool
- Click the # next to Table label
- Choose “Table Inspector”
- Right-click each cell, select “Table Cell Properties”
- Set type as “Header Cell” and Scope as “Row”
Table Summary
A Table Summary will give the screen reader user a chance to briefly know what the table data is about before having the screen reader start reading it off. Compose a brief description of the table data to add to the table. A table summary is only necessary for a complex or long table.
To add a Table Summary:
- Open the TouchUp Reading Order tool
- Right-click anywhere in the table
- Choose “Edit Table Summary” Add Summary, Click “OK”
